

Web Developer Tools / Responsive Design Mode
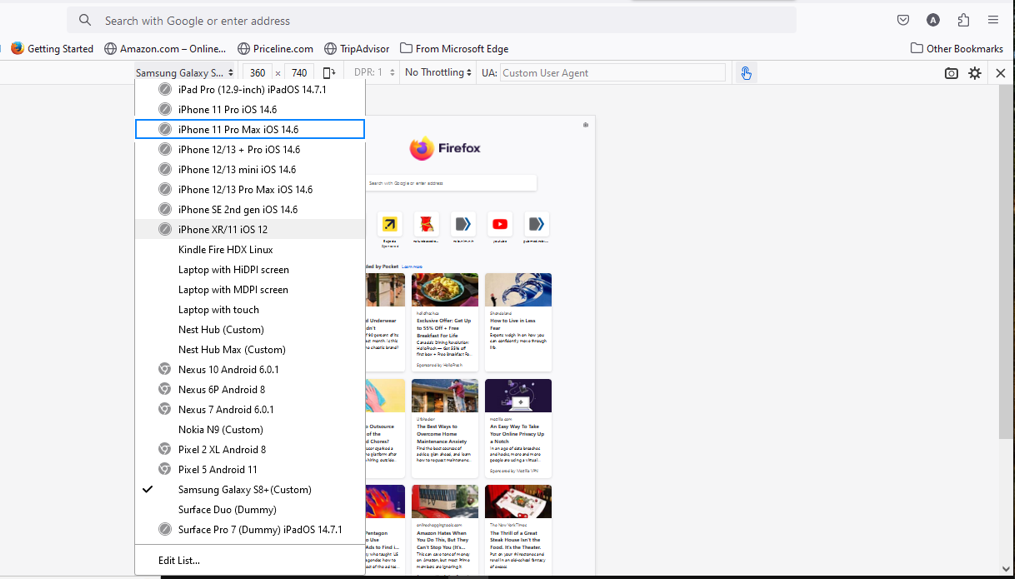
It used to be that all ticked device settings in Edit Mode, standard and custom, are selectable in Web Developer Tools / Responsive Design Mode. Before, the cursor, indicated by the blue outlined box as shown in the attached screen shot, wraps around the list of devices to show the other hidden device settings. But now, the cursor just wraps but the values in the list do not adjust to show the other device setting that are available to be selected.
I don't know if I unknowingly, did something that triggered the lost functionality mentioned above.
How could I restore this lost functionality so that I could test my website in all the device settings that I have checked in the Edit mode?
所有回覆 (1)
You can use code in userChrome.css to add a scroll bar to this panel. The code needs to be above a possible @namespace line. Add CSS code to the userChrome.css file in the chrome folder in the Firefox profile folder.
- /questions/1409805 Responsive Design Mode
/* RDM: add a scroll bar to the device selector drop-down */
@-moz-document url(chrome://devtools/content/responsive/toolbar.xhtml){
 #device-selector-menu .tooltip-panel {overflow:auto !important;}
}
It is not that difficult to create userChrome.css if you have never used it.
The first step is to open the "Help -> Troubleshooting Information" page and find the button to access the profile folder with the random name (xxxxxxxx.default-release).
You can find the button to go to the profile folder under the "Application Basics" section as "Profile Folder -> Open Folder". If you click this button then you open the profile folder in the Windows File Explorer. You need to create a folder with the name chrome in the profile folder with the random name (name is all lowercase). In the chrome folder you need to create a plain text file with the name userChrome.css (name is case sensitive). In this userChrome.css text file you paste the text posted. On Mac you can use the TextEdit utility to create the userChrome.css file as a plain text file.
In Windows saving the file is usually the only time things get more complicated because Windows can silently add a .txt or .css file extension and you end up with a file like userChrome.css.txt or userChrome.css.css. To avoid this, you need to make sure to select "All files" in the "Save File" dialog in the text editor.
You need to close (Quit/Exit) and restart Firefox when you create or modify the userChrome.css file.
More info about userChrome.css/userContent.css in case you are not familiar:
- https://www.userchrome.org/what-is-userchrome-css.html
- https://www.userchrome.org/how-create-userchrome-css.html
- https://www.userchrome.org/firefox-changes-userchrome-css.html
In Firefox 69 and later you need to set this pref to true on the about:config page to enable userChrome.css and userContent.css.
- about:config => toolkit.legacyUserProfileCustomizations.stylesheets = true
- https://support.mozilla.org/en-US/kb/about-config-editor-firefox
由 cor-el 於 修改