

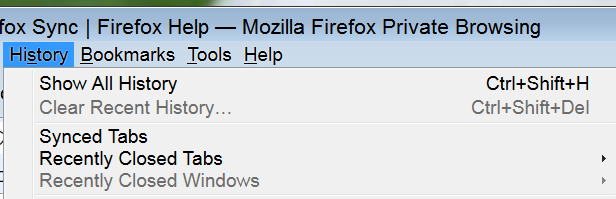
How do I remove "synced tabs" from history menu?
After the latest update, "synced tabs" suddenly appeared in my history menu above Recently Closed Tabs. I don't use syncing of any sort so this is just a nuisance. How can I get rid of it?
Обране рішення
That would be this selector: #sync-tabs-menuitem
Add CSS code to the userChrome.css file in the chrome folder in the Firefox profile folder.
#sync-tabs-menuitem { display:none!important; }
It is not that difficult to create userChrome.css if you have never used it.
The first step is to open the "Help -> Troubleshooting Information" page and find the button to access the profile folder with the random name (xxxxxxxx.default-release).
You can find the button to go to the profile folder under the "Application Basics" section as "Profile Folder -> Open Folder". If you click this button then you open the profile folder in the Windows File Explorer. You need to create a folder with the name chrome in the profile folder with the random name (name is all lowercase). In the chrome folder you need to create a plain text file with the name userChrome.css (name is case sensitive). In this userChrome.css text file you paste the text posted. On Mac you can use the TextEdit utility to create the userChrome.css file as a plain text file.
In Windows saving the file is usually the only time things get more complicated because Windows can silently add a .txt file extension and you end up with a file named userChrome.css.txt. To avoid this you need to make sure to select "All files" in the dialog to save the file in the text editor using "Save File as".
You need to close (Quit/Exit) and restart Firefox when you create or modify the userChrome.css file.
More info about userChrome.css/userContent.css in case you are not familiar: *https://www.userchrome.org/what-is-userchrome-css.html
- https://www.userchrome.org/how-create-userchrome-css.html
- https://www.userchrome.org/firefox-changes-userchrome-css.html
In Firefox 69 and later you need to set this pref to true on the about:config page to enable userChrome.css and userContent.css in the chrome folder.
- about:config => toolkit.legacyUserProfileCustomizations.stylesheets = true
- https://support.mozilla.org/en-US/kb/about-config-editor-firefox
Усі відповіді (2)
Вибране рішення
That would be this selector: #sync-tabs-menuitem
Add CSS code to the userChrome.css file in the chrome folder in the Firefox profile folder.
#sync-tabs-menuitem { display:none!important; }
It is not that difficult to create userChrome.css if you have never used it.
The first step is to open the "Help -> Troubleshooting Information" page and find the button to access the profile folder with the random name (xxxxxxxx.default-release).
You can find the button to go to the profile folder under the "Application Basics" section as "Profile Folder -> Open Folder". If you click this button then you open the profile folder in the Windows File Explorer. You need to create a folder with the name chrome in the profile folder with the random name (name is all lowercase). In the chrome folder you need to create a plain text file with the name userChrome.css (name is case sensitive). In this userChrome.css text file you paste the text posted. On Mac you can use the TextEdit utility to create the userChrome.css file as a plain text file.
In Windows saving the file is usually the only time things get more complicated because Windows can silently add a .txt file extension and you end up with a file named userChrome.css.txt. To avoid this you need to make sure to select "All files" in the dialog to save the file in the text editor using "Save File as".
You need to close (Quit/Exit) and restart Firefox when you create or modify the userChrome.css file.
More info about userChrome.css/userContent.css in case you are not familiar: *https://www.userchrome.org/what-is-userchrome-css.html
- https://www.userchrome.org/how-create-userchrome-css.html
- https://www.userchrome.org/firefox-changes-userchrome-css.html
In Firefox 69 and later you need to set this pref to true on the about:config page to enable userChrome.css and userContent.css in the chrome folder.
- about:config => toolkit.legacyUserProfileCustomizations.stylesheets = true
- https://support.mozilla.org/en-US/kb/about-config-editor-firefox
Thanks as always, cor-el!